Official Luthiers Forum! http://www-.luthiersforum.com/forum/ |
|
Go-Bar deck http://www-.luthiersforum.com/forum/viewtopic.php?f=10102&t=6887 |
Page 1 of 1 |
Author: | Michael Shaw [ Sat May 27, 2006 2:31 pm ] |
Post subject: | |
Hi! does anyone know where I can get instructions on building a go-bar deck. I know people sell them. I want to make my own though. I see some people use dow sticks for the rods and some use square sticks. Which are better and what type of wood do you use for the sticks. Thanks...Mike |
Author: | Andy Zimmerman [ Sat May 27, 2006 2:47 pm ] |
Post subject: | |
It is really easy. I just bought a couple pieces of wood and used threaded rods between them. My rods are from home depot... Fiberlgass reflector rods with the reflectors taken off As you can see from mine, I should have used 2 pieces up top because of the deflection by the pressure of the rods ![]() |
Author: | rich altieri [ Sat May 27, 2006 2:49 pm ] |
Post subject: | |
Hey Mike. Before you go out and build a deck and buy go bars, check this out. My ceiling is my deck. These fiberglass rods are heavy duty and picked them up at Home Depot for around $2 each. They are driveway markers. Some had reflectors on them which I simply sawed off. If you are fortunate to have a low ceiling, this approach is working great for me. The rods are roughly 36" |
Author: | Michael Shaw [ Sat May 27, 2006 2:54 pm ] |
Post subject: | |
Hey thanks for the idea's especially the reflector rod idea....Mike |
Author: | Dread1916 [ Sat May 27, 2006 3:50 pm ] |
Post subject: | |
Reflector Rods are great...I cut mine and got a 2 for 1 deal...only thing is that the rods are 21" long so I use a 20" deck height (well deck height after the piece parts are laid out). Since I'm in my 1st build...I did't bother making a really nice set up...(I've made plenty of really nice jigs so far and I just wanted to get back to actually working ON the guitar)... 2x4's and some MDF (left over from the 4' x 8' sheet I got for making dish molds)...add some dry wall screws and you're done!!! If you're going for a more perminate shop fixture...there are a few pictures floating around the net that you may want to search on...(I didnt save them...) But...one creative soul uses a heavy duty shelf in their shop that is placed over the work bench...effectly creating a go-deck. Hope this helps...good luck JP |
Author: | Serge Poirier [ Sat May 27, 2006 4:11 pm ] |
Post subject: | |
Hi Michael! Here are a few shots of the construction of my deck, based on the model that Pat Foster showed here, it is very sturdy on both the top and bottom, 2 plates each were glued and 4 --1/2" theaded rods inside tubing and nuts to make it all secure Serge |
Author: | RCoates [ Sat May 27, 2006 6:55 pm ] |
Post subject: | |
I used a portion of an old table top (28"x28") and mounted it on a wall with a hinge so it lays flat against the wall when not in use. To use it I lift it and have a light chain attached (at the two front corners) with eye bolts running up to the wall above it. Above the deck is a shelf that is my top. For rods I used 3/8" or 1/4" strips I ripped from a pine board. |
Author: | Mattia Valente [ Sat May 27, 2006 7:07 pm ] |
Post subject: | |
Mine's...under my desk. Because there's no space above it. Next one will just be a sheet of ply bolted to the cross-beams in the roof of my shop :-D |
Author: | Colin S [ Sat May 27, 2006 8:26 pm ] |
Post subject: | |
I found on my old one that the two front supports got in the way when glueing on the braces and placing the go-bars. So, I built this one with heavy duty brackets, made from angle iron, which just bolts to the wall, 2 layers of 18mm ply for the top, rods (kite spars) are stored in drainpipe brackets on the top. A moveable platform is used for bracing tops/backs and is taken away for glueing tops and back to the rims. ![]() Colin |
Author: | Robbie O'Brien [ Sun May 28, 2006 1:00 am ] |
Post subject: | |
Very interesting bracing pattern there Ronn. Care to elaborate? |
Author: | Rod True [ Sun May 28, 2006 1:07 am ] |
Post subject: | |
Here's mine, it's part of my bench area and the underside of my loft ![]() |
Author: | burbank [ Sun May 28, 2006 2:24 am ] |
Post subject: | |
I found that by using tubing as spacers between the top and bottom, such as Todd has, and putting them under compression from the nuts, the deck was less wobbly, though strength is not affected. The spacer on the bottom is used when gluing braces and is removed for gluing the top and back. ![]() |
Author: | Bill Greene [ Sun May 28, 2006 4:15 am ] |
Post subject: | |
I used 1" metal conduit for my struts, and ran 1/2" all thread through it. The top and bottom are just 1" screwed/glued MDF boards left over from basement renovation, in a 2' square pattern. I used big flat 2" washers to sandwhich the top and bottom, and that's it. The thing is total overkill, and it's so heavy I don't like lifting it...BUT I did it just make sure the deck is sturdy enough handle all the rods. Here's why: The first one I used wasn't sturdy enough to handle the combined pressure of the rods, and I'd get 7 rods in, and the 8th rod would be the one that slightly bent the top and BAM, those prior 7 would go shooting out all over the place. Very, very aggravating. And I also used the driveway reflectors as go-bar rods. The ones I bought are 48 inches long, and 1.49 each (without tax). There's a store near here with bunches of 'em. |
Author: | Michael Shaw [ Sun May 28, 2006 4:19 am ] |
Post subject: | |
Hey Todd thanks for the links I think i'll order some rods and cap's. I see they are 48" do you cut them in half? |
Author: | Michael Shaw [ Sun May 28, 2006 4:22 am ] |
Post subject: | |
Hey I didn't know kite making was that advanced. Graphite rod. |
Author: | RichB [ Sun May 28, 2006 5:27 am ] |
Post subject: | |
Hi Butt... 
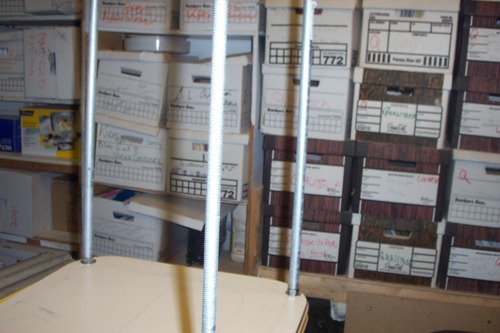
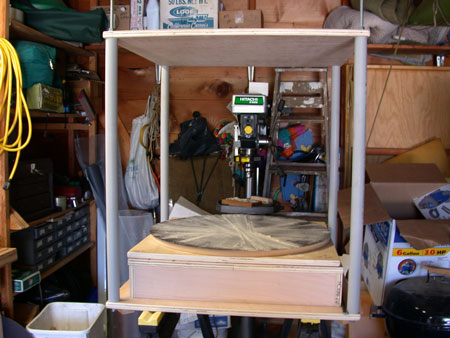
I had followed the Stew-Mac's plan to the tee, and put a go-bar deck as per their instructions. However, by the time I was done it weight a ton, so I built another one, & his time it was a "less-heavy duty" one. Downsizing the threaded rod size, & not using 4 pieces of 2' X 2' for the base (only 2), and it has worked out just fine. 
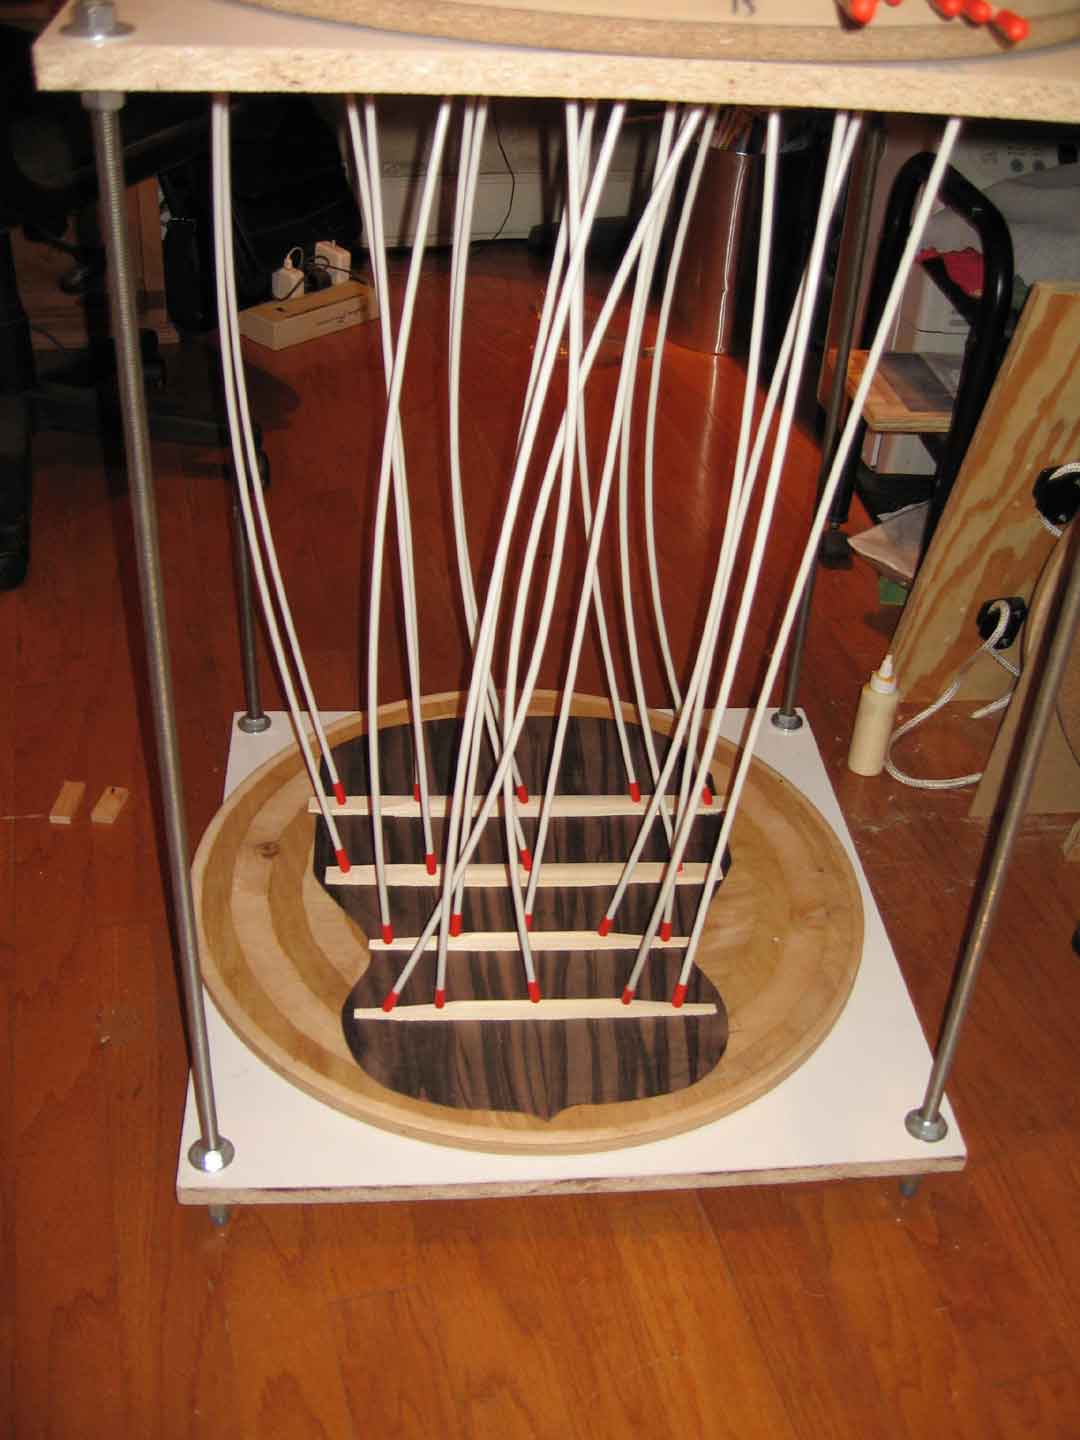
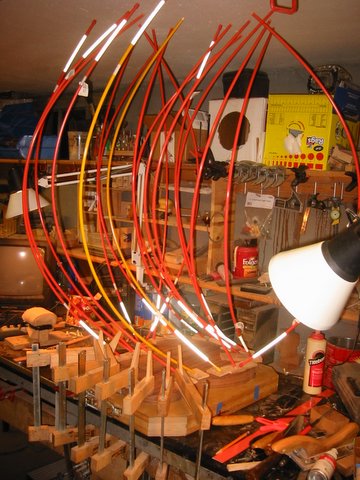
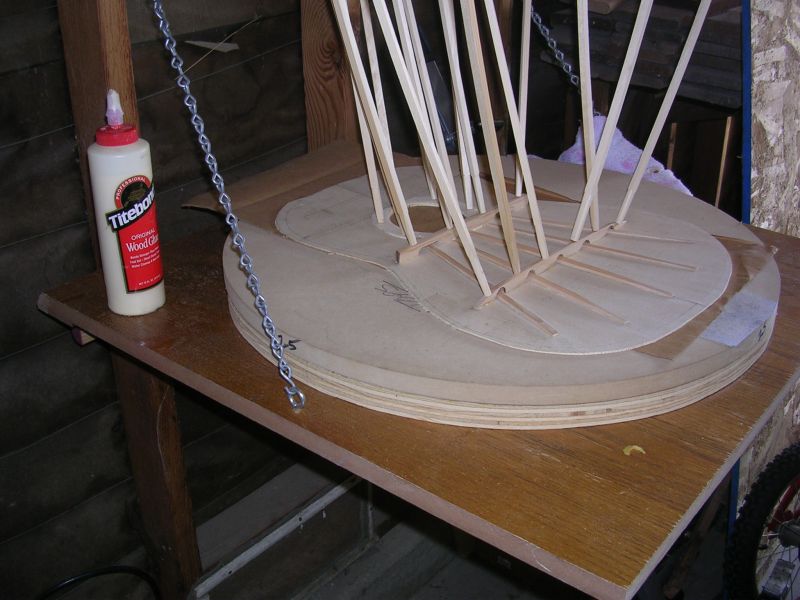
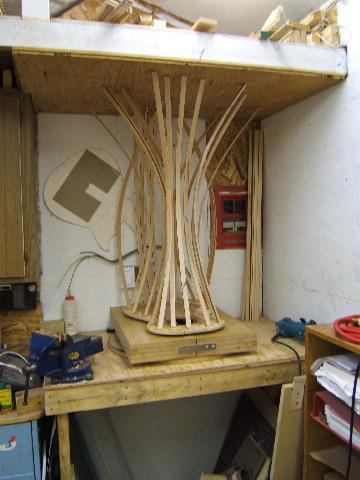
I can say, that the 'height factor' for the rods later turned out to be a bit of a problem, as the rods need to be different lengths to fit in w/ the right tension, when & if you glue your top & back on to the body using the go-bar rack. Add in the thickness of the sanding dishes too. So you see, the lengths of the rods change at different stages of your assembly. Longer, for gluing the braces to top & back, & shorter for gluing top & back to body. To remedy this, someone had posted a pic of a go-bar deck that was made, so that the top & bottom platforms were adjustable w/ adjustable pipe clamps. This way you can raise or lower the distance in between to accomodate one set of rods. I think Kathy Matsushita was the one who posted some info on this, but I could not find it on her site? I hope this made some sense to you? It's a little hard to see what I'm talkin' about w/o pics. I am going to still build another one using the pipe clamps, in an effort to...having less rods around for the show! |
Author: | Michael Shaw [ Sun May 28, 2006 6:59 am ] |
Post subject: | |
Todd I ordered 25 rods... is that enuff? Thanks again! |
Author: | Michael Shaw [ Sun May 28, 2006 7:39 am ] |
Post subject: | |
Thanks everyone |
Author: | Billy T [ Sun May 28, 2006 9:04 am ] |
Post subject: | |
Man! I like them all! I really like the "off the roof" one, cause I don't have a lot of room. Did you reinforced the plaster/wallboard/concrete? Great ideas on rods too! Thanks guys! |
Author: | RCoates [ Sun May 28, 2006 2:29 pm ] |
Post subject: | |
[QUOTE=Robbie O'Brien] Very interesting bracing pattern there Ronn. Care to elaborate?[/QUOTE] Robbie, It started out as the Bouchet five fan pattern and along the way I made a few minor modifications. I've no idea what it'll sound like. I'm spraying it right now so, after I FP the top and string it up. I'll post some pics and impressions. |
Author: | TonyKarol [ Sun May 28, 2006 11:07 pm ] |
Post subject: | |
I had one of the threaded rod types originally as well, but it was always geting in the way, plus if I took it apart it was always a chore to make it up again. So I dropped the top deck off the floor joists above my router table (its big) and then use that as the lower deck. I made a couple different risers to accomodate the differences in just gluing braces, or gluing a top or back onto a rim (both including bowls). Now its always there, and with the risers can be set up in a minute. If I ever do it again, I would make it double width though. It also doubles as a high shelf for storing (losing) stuff !!! Just made a purfling cubby hole boxfor up there to control the out of controlness of all that stuff (48 slots). You never knew if there was any single blk lines left without taking out a whole bundle of assortments. |
Author: | Robbie O'Brien [ Mon May 29, 2006 3:37 am ] |
Post subject: | |
[QUOTE=RCoates] [QUOTE=Robbie O'Brien] Very interesting bracing pattern there Ronn. Care to elaborate?[/QUOTE] Robbie, It started out as the Bouchet five fan pattern and along the way I made a few minor modifications. I've no idea what it'll sound like. I'm spraying it right now so, after I FP the top and string it up. I'll post some pics and impressions.[/QUOTE] I would be interested in hearing about the results when the time comes if you care to share. |
Page 1 of 1 | All times are UTC - 5 hours |
Powered by phpBB® Forum Software © phpBB Group http://www.phpbb.com/ |